NASH is the National Authentication Service for Health to enable secure access and the sharing of health information. The new NASH certificate issued by Health Professional Online Services (HPOS) will enable use of both the Online Provider Directory and My Health Records in Bp VIP.net.
Set up PRODA and obtain your NASH certificate
Run through the following tasks to obtain your NASH certificate and passphrase. Your practice may already have performed some of the steps.
|
|
Action |
Resource |
|---|---|---|
|
1. |
Register with PRODA (Provider Digital Access) and obtain your PRODA account login Username and Password. |
Services Australia (PRODA) |
|
2. |
Obtain your HPI-O number through HPOS. |
Services Australia (HPI-O) |
|
3. |
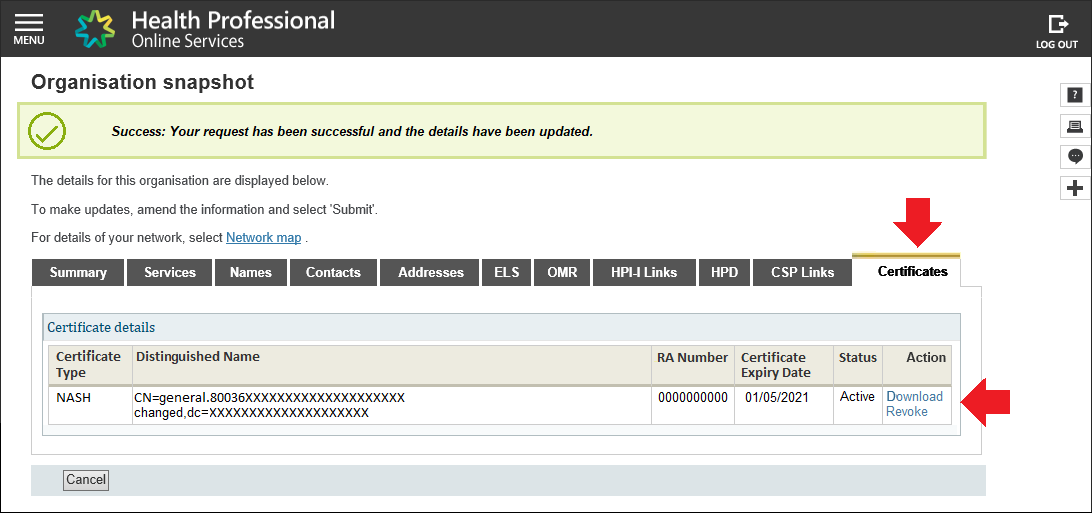
Obtain a NASH PKI Certificate through HPOS. An example success message from Online Services is shown below. |
Services Australia (NASH) |
|
4. |
The passcode for your NASH PKI certificate will be sent via SMS to phone of the applicant registered in step 3. You will need this passcode when installing the NASH certificate. |
Sent by SMS |
|
5. |
Copy the digital NASH PKI certificate to the Bp VIP.net server. |
|
|
6. |
Install Medicare Online for Bp VIP.net. |
|
|
7. |
Download the following certificates from Verizon Certificates Australia > Quick Links > Medicare Australia PKI:
Sha1 certificates will become deprecated for use as Medicare PKI certificates in the future. |
|
|
8. |
Copy all certificates from step 7 to the Bp VIP.net server. |
|
|
9. |
Create a Group policy for the certificates so that all users within your domain can access the certificates for My Health Record. Your IT service provider can assist. |
Install the NASH certificate
- In a Windows File Explorer, browse to the downloaded NASH certificate.
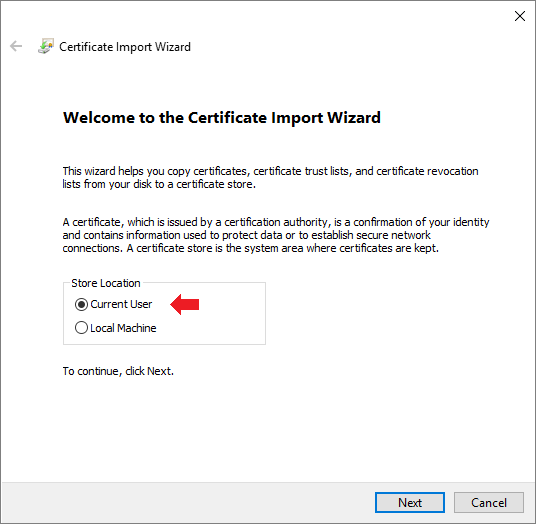
- Double click the file shown in the screen shot above to open it. The Certificate Import Wizard screen is displayed.
- Change the Store Location to Current User.
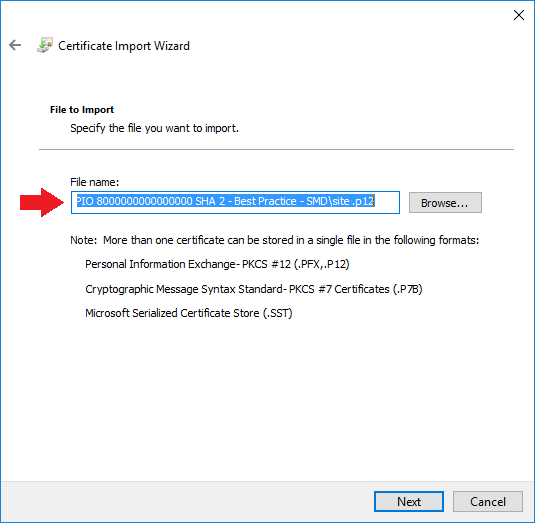
- Click Next. The File name displays the certificate.
- Click Next on Certificate Import Wizard.
- Enter your PIC passphrase you received by SMS.
- Click Next.
- Select Place all certificates in the following store and click the Browse button.
- Select Personal and click OK.
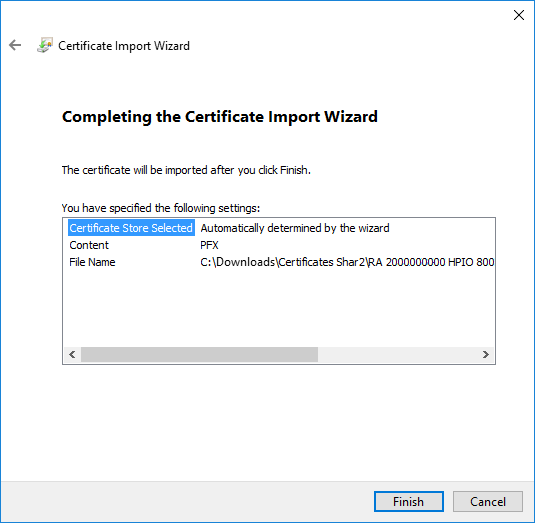
- Click Finish to complete the certificate import.
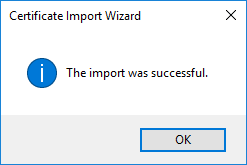
- Click OK on the import success notification.
- Repeat steps 1 - 7 and select the Trusted Root Certificate Authorities certificate store.
- Repeat steps 10 - 12 to complete the certificate import.

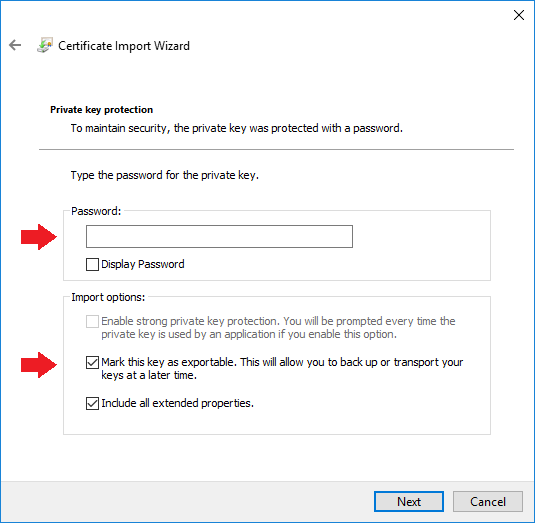
TIP You can select Mark this key... as exportable but this is optional.

The Select Certificate screen is displayed.
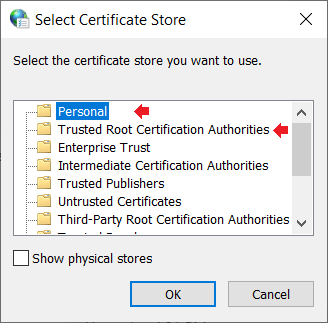
IMPORTANT These steps must be repeated for the Trusted Root Certificate Authorities certificate store.
Import the OCA and Root CA Certificates
The OCA and Root CA certificates must be installed with the NASH certificate to form the chain of trust for the NASH certificate to validate. You can follow the instructions for Installing the Nash certificate to install these certificates; the only difference will be the Certificate Store selected in Step 8.
NOTE 'SHA1' certificates use a deprecated encryption algorithm and you should only ever need to download SHA1 certificates for some troubleshooting scenarios.
- Browse to and double-click the OCA certificate Sha2 certificate file. Select either Current User or Local Machine.
- Import the certificate into Certificate Manager At step 8, select to import into the Intermediate Certification Authorities store.
- Browse to and double-click the Root CA certificate Sha2 certificate file. Select either Current User or Local Machine.
- Import the certificate into Certificate Manager. At step 8, select to import into the Trusted Root Certification Authorities store.
Certificate import is complete.
IMPORTANT Because the NASH, OCA, and Root CA certificates have only been installed under one user, speak to your IT to create a Group policy for the certificates so that all users within your domain can access the certificates for My Health Record to view and upload records.
Related articles
Last modified: November 2021